Showing posts with label gardening. Show all posts

Monday, January 18, 2016

Just Life| Gardening books

Even though we are in the middle of winter, I just read that this is the best time of the year to buy flower bulbs for your garden. This is also time to trim the trees and bushes in the backyard.


I am clueless about gardening. If you are in the same boat as me, the library has plenty of gardening books for both of us.


Here are a few gardening books that you can find in your local library:


The New Sunset Western Garden Book

Pots in the garden: Expert design and planting

techniques

Easy Growing: Organic Herbs and Edible Flowers from Small Spaces

Happy gardening everyone.

Signing off until next Monday- Panteha


Wednesday, April 23, 2014

Learning | Roses

The rosebushes in my backyard are exploding with color right now.  I love to look at them through my kitchen window, or my patio door, or from my deck. After I appreciate their beauty, I start thinking about gratitude. 

I'm glad I was raised by a mother who shared her love of roses with her children.  Every house we lived in had to have roses in the garden. She patiently taught me how to carefully trim rosebushes, to encourage more blooms.  She shared the technique of watering a rosebush at the base, to prevent wet leaves from causing the black spot disease (which was very common in Louisiana.) She had a collection of small vases, suitable for displaying single blossoms. I loved replacing the tired-looking blossoms with fresh cuttings. I can remember a few names of the varieties she grew: Peace, President Lincoln, Queen Elizabeth, Chrysler Imperial, American Beauty, and Freedom.
Peace Rose.  From T.Kiya's photostream on Flickr.com.
Some rights reserved.

I also think about how thankful I am that the previous owners of my house chose to plant so many bushes, and selected such a variety of types.  I don't know the names of all of them.  

Rose lovers (and trivia buffs, and other readers of non-fiction) will appreciate Douglas Brenner & Stephen Scanniello's A Rose by Any Name: the Little-Known Lore and Deep-Rooted History of Rose Names.


Did you know more than 15,000 varieties of roses are cultivated around the world? Brenner and Scanniello tell some interesting tales about the naming of some of them--not just the names, but what certain roses represented in times past. Which rose became a symbol for the American temperance movement? Which rose was named after a not-very-diplomatic diplomat? The answers to all of these questions, and many more, are revealed in this book.


Thursday, February 13, 2014

Book Bucket List | Time to Read up on Gardening...

It's almost Spring! I'm excited about this for a couple of reasons.  One, that it will hopefully keep raining, and two, that I get to start gardening in earnest. Last year was the first year that I ever put in much effort with gardening, and it soon became one of my favorite hobbies.  Since I'm still a newbie, I've been looking up some of the highest recommended books by expert gardeners.

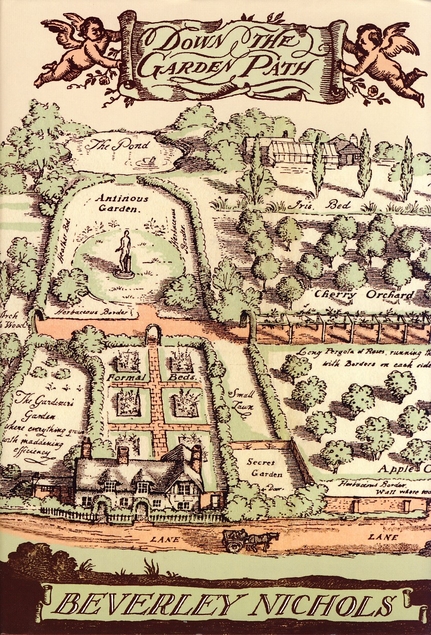
Beverley Nichol's classic Down the Garden Path  contains Nichol's autobiographical trials and tribulations, and a lot of funny stories, about her attempt to turn a lifeless lot into a beautiful garden.  For a beginner like myself, it provides a lot of tips and tricks as well as reassurance that I'm not a complete failure as a gardener.

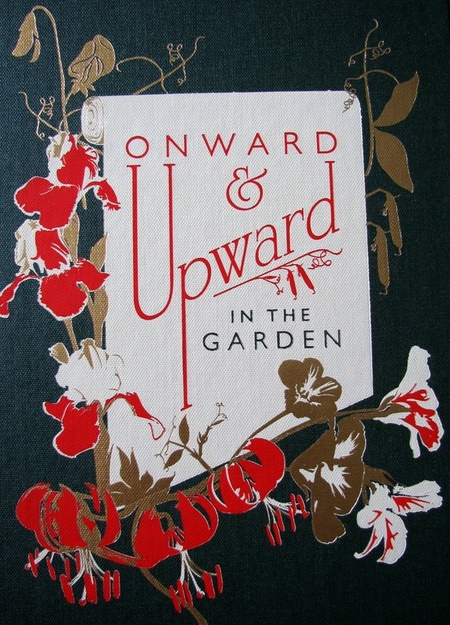
Onward and Upward in the Garden is another great resource for gardeners.  In 1925, Katharine White published 14 articles for The New Yorker on gardening.  After her death in 1958, her husband E.B. White, assembled her work and had them published together as a book.  These articles are considered classics that every gardener should read at some point in their gardening careers.

Our libraries also carry one of my favorite gardening magazines, Sunset.  This magazine not only has articles about gardening in our local climate, but information about getaways, recipes, and other awesome things on the west coast.  It's a magazine I read every month because it has so much interesting semi-local information.  Magazines can also be checked out for three weeks at a time, just like books! So next time you're in, flip through a copy and see what you think.

Friday, March 29, 2013

Short Attention Span Challenge | The Seedling Starter


From Escalon to Thornton, Tracy to Linden, the Central Valley knows how to do many things well, but one thing in particular stands out to me: farming.  It cracks me up when driving down country roads I see tourists stop to take pictures near a grapevine or an almond orchard.  I guess because I grew up here I didn't really think a grape vine or an almond tree was a big deal.  The funny thing, as I have said in previous posts, is that I in no way have a green thumb.  Starting a plant from seed has been fairly impossible for me, but the farmers around here do it every year!  It really is a miracle, and maybe one I take a little bit for granted.  Whether my children decide to stay here in the Valley or move on to - dare I say it - greener pastures (though I doubt they will find any), I want my kids to understand and appreciate that they come from a region that supplies food to the entire world. We really are a small miracle!  According to this 2011 report, two-thirds of the landscape in the Delta Region consists of agriculture.  In our county's Delta region, there are nearly 215,000 acres of farmland, producing a farm gate value of approximately $558 million!  That's a lot of food!

We don't usually keep library books on the grass!
The Challenge
Show my kid how to plant a seedling the right way.  Hopefully it will be successful this time!

The Process
I will be up front with you here.  This challenge was not difficult.  However, it is a skill (and it let me spend some much needed quality time with my little one).  So, I hope you will forgive me that this blog isn't as exciting as usual (Assuming you think my blogs are interesting.  If you think they are hum-drum, and still reading them every week, then you are probably related to me---Hi Mom!).

As I mentioned in this post, part of my trouble had been that I didn't have a cold frame.  Since that issue is solved, I needed to figure out my other challenge, getting the seeds to grow.  According to both books I checked out (this one and this one), in order to germinate seeds, you can start with a plastic tray, milk containers, foam cups, a small pot, or a cardboard container and fill it with compost, peat pellets or seed starting mix.  I went to my local nursery and asked them if they ever gave away extra plastic trays that the plants are sold in.  They said yes!  So my seed starting container was free (this might be the most excited I have ever been over plastic containers).  Even though I am not supposed to get advice, the nurseryman told me to wash out the containers with a little bleach to sanitize them, since I would be using them for seeds.
Next, I purchased the seeds at our local hardware store.  There are a few ways to figure out what seeds to start with.  On the back of the seed container, there is usually a planting schedule for each particular zone.  There are two zone maps, the USDA Plant Hardiness Map, or the American Horticulture Society Plant Heat Zone Map.
AHS Heat Zone Map - Zone 8 or 9

The seeds I purchased and planted:
  • Tomatoes
  • Basil
  • Beets (which are out of season, even though the package said otherwise-oops!)
  • Carrots
  • Cucumbers
  • Yellow Squash

  • Jalapeno Peppers
One of the books suggested I mix the planting mix with water in a bucket before planting, which I had never done before.  I used a large bucket.  I poured the water and my daughter mixed.  It was quite fun for her, I think!  One thing to note is that the soil should not be soggy, but just moist.  It would have helped if I had noticed that part before I turned on the hose.
Look at those fancy gardening shoes!

MUD!!!!
After that, we put the mix into the plastic containers.  Then, we stuck our fingers or shovel in to make a little hole, and placed in the seeds. We covered the hole with 1/4 to 1/2 inch of soil/compost.  After that, we put the seed tray in the cold frame we made a few weeks ago.

The Result
I don't know yet!  I will update this post when I see some or a lack of seedlings, start to sprout.  In the meantime, check out one of SSJCPL's gardening books and plant something!  
P.S. Did you notice my blog has moved to Fridays at 2 p.m.?

    Wednesday, March 6, 2013

    Short Attention Span Challenge | Plants vs. Zombies

    I was listening to the radio recently and they were talking about "survival packs" for a zombie apocalypse type of emergency.  One of their suggestions was to save packets of seeds, in case at any point there was a shortage of food.  "Wow! what a great idea," I thought to myself, until I remembered two things: one, I am a terrible gardener and two, other than put them in the ground and water them (which to me seems simple enough), I do not really know how to start seeds.  If I was depending on seeds, I wouldn't make it very long, at least in human form.  Zombies don't eat veggies.

    Even though I know basically nothing about gardening, every year I at least try and start a seedling.  Although, I never actually took the time to research how to properly do this.  One year,  I planted seedlings in plastic cups.  The cups cracked in the sun, and didn't drain, and nothing grew.  Plus, we carted them from our playroom to the yard every once in a while daily, but that was a hassle.  The next year, my daughter and I planted seeds in little biodegradable cups that you can plant directly into the garden once they sprout.  We carted them in and out almost everyday, but this time, the birds came down and picked at the little cups, upending all the seedlings and taking the cups away for their nests.  I discovered I was starting them all wrong.  Seedlings do not have to be indoors.  If you do not have a greenhouse, you can create something called a "cold frame".  It protects seedlings and starter plants from the frost, wind, birds, and allows them to get sunlight in the daytime.

    The Challenge
    Create a cold frame. 

    The Process
    Cold frames are relatively easy to create.  Simply put, a cold frame is a box with hard opaque sides and a clear lid.  The box can be made from many different types of materials.  Some books I read suggested making one out of hay bales and covering the top with an old window frame.  Other books suggested taking plywood, creating a box and covering it with plastic sheeting.  The idea is to create a warm place for seedlings, by capturing enough sunlight in the daytime to warm the box and the soil.  The cover should be something that can be easily opened or modified.  The box needs to remain at approximately 70 degrees F, so if the temperature rises above that during the day, the lid should be cracked open or pulled back a bit.

    We had a bunch of old 2x4s laying around, so I decided to use those to make my cold frame.  I also had an old IKEA changing table, so I used the wood from that as well.  Since I have small children, I decided to use a clear acrylic plastic for the lid.   I was concerned plastic wrap would be a choke hazard, and glass would get broken.  I purchased a 2'x4' piece of plastic at the hardware store for about $25.  Many of my books suggested making a box with a hinge attached, but I thought that would be hard to create, and I also didn't want my kids to get their fingers or bodies smashed under the lid.  Instead, I decided to make a way to slide the door open.

    The box does not need to have a bottom.  In fact, some people put them directly into the garden and grow seedlings in the ground beneath the box.  I don't have much empty garden space, so I made my frame portable, and I will plant seeds in clay pots.  When the frame is not in use I can put it up on its side against the fence behind our metal shed.

    Look at the awesome drill!


    I used the 2x4s to create 3 rectangular frames that would fit around the plastic.  Using a saw (which I kept calling a "drill", thoroughly confusing my husband) I cut six 51", boards and six 25" boards.  Lengthwise, I cut about 1/4 off one the 25" boards.  I drilled screws (with an actual drill) into the boards to make the 3  rectangular shaped frames.  Then, I placed the frames on top of each other.  The frame with the board cut lengthwise went on top, with the gap facing up.  I secured the frames together by using little pieces of the changing table.  I drilled two long pieces of the changing table level with the bottom of the gap, on the inside of the frame.  After securing the frame, I slid the plastic piece over the gap and rested it on the long pieces of the old changing table (they are the pink wood in the box).  The plastic slides back and forth for easy opening.  
    The Result
    I know it isn't the cutest cold frame in existence, but it is functional!  When I have more time, I plan on painting the inside white to reflect more sunlight onto the plants and soil.  Another fun project would be to ask my little one to help me decorate the outside of the box using paint. 


    In retrospect, it might have been better to create a gap on either side of the box, so that the plastic could be cut in half and slide out in smaller pieces.  Right now, when the box is half open, the plastic sticks out pretty far.

    Ditz alert: In order to get the screws into the boards, I had to drill a guide hole into the frame first.  I was cursing at the drill and how annoying it was to take the hole maker (I don't know what the name is for this, obviously) off and then put the other drill bit on to insert the screws.  I did this over and over, for every board.  Then I realized I could just make the holes on ALL the boards at once, then go back and drill in the screws.  Duh.

    Friday, February 8, 2013

    Short Attention Span Challenge | The Crepe Murderer

    52 Skills in 52 Weeks...It's starting to get really hard, and I have only done 5 challenges!  I am also starting to question my sanity when I originally thought this blog was a good idea for a full time working mother of two young kids, but I'm not a quitter, so I'll keep on trucking.  I recognize that not every challenge is going to be fun, or exciting, or even necessarily successful.  I fear this week was one of those challenges.  However, I promised to share my journey, even the boring parts, so here I go...


    I'm not sure why I thought that pruning was going to be a good challenge.  Perhaps I was doing a little multitasking of "stuff I already need to do" and this blog.  We moved into our house about 4 years ago and truthfully, we really don't know what we are doing when it comes to landscaping.  We have the "plant it, leave it, hope it lives, and hope it looks good" technique.  When we moved in, we inherited three beautiful crepe myrtles along our back fence.  Of course, with our nonexistent minimal landscaping expertise, we really had no idea what to do with them.  Do we prune them all the way back?  Do we leave them?  Again, no clue.  So, imagine our relief when one winter day we drove through a parking lot with a bunch of crepe myrtles, all trimmed harshly back to the stubs.  Yes!  That is what you do with them!  I was filled with joy and relief that I would not need to do any research in order to get these pruned (okay I might be exaggerating, I didn't think it was that big a deal).


    The Challenge
    Research and properly prune a mature crepe myrtle.

    The Process
    I started my challenge by checking out several landscaping books about pruning.  As I started my research, I realized none of these books suggested anywhere that cutting your crepe myrtle back harshly was the correct way to prune one.  " No", I said to myself, "there must be an exception.  Why would that gardener and so many other landscapers prune their trees so far back if it wasn't right?" I checked the Sunset Gardening Book, the Pruner's Bible.  No one thought this was the right way to do it.  So, I consulted with our online database, featuring magazine articles and scholarly journals.  Surely, I would find someone who said that cutting my trees back was good.  No, not at all.  In fact, not only did they discourage this practice, several gardening experts called gardeners who practice this type of pruning, "crepe MURDERERS!"  Woah!!!! Hold the phone!  Between the Pruning Bible and the crepe murdering, aren't we taking our gardening a little too seriously?  Just saying...
    Wrong way...I think

    Weird damaged branch from over pruning.
    Apparently, the correct way to prune a crepe myrtle is NOT to cut your tree back all the way to the stem.  It can permanently damage the bark, make it susceptible to disease, and create ugly little nubs all over the trunk where the tree has been previously trimmed too far back.  The correct way to prune a crepe myrtle is carefully.  Break off the weak and leggy shoots, make sure branches are not rubbing against each other, and remove branches that grow up through the middle of your plant.  It is a delicate process, not a harsh one.  I did this with one of my crepe myrtles.  It was actually a little relaxing---although, honestly, not as fun as hacking away all the branches.
    Correctly pruned tree...maybe?

    The Result 
    This was one challenge where, unfortunately, the results will not be visible right away.  As of now, I have a crepe myrtle in my yard with no branches, one correctly pruned tree with branches that have room to grow, and another tree that hasn't been pruned at all.  I think I am just going to leave them and see what happens!  Am I a pruning expert?  Well, obviously no.  I think that it is something that takes a little more than a week to master.  I'm still not totally sure I pruned my tree correctly.

    HELP ME!
    Okay readers...I really need some more challenge ideas!  If you don't want to be subjected to boring posts about "Crepe Murdering", comment with some ideas.  I promise, if it is something I can attempt, I will put it on the list!

    Here are a few I was considering...photography, couponing, juicing, tiling, candlemaking, cheesemaking, car detail, painting, menu planning.  I would love some more suggestions!